This post will demonstrate how to create an Azure Function with private site access. Private site access refers to a way for resources within a virtual network to reach out to an Azure Function. Configuring private site access ensures that the specified Azure Function is not able to be triggered via the public internet. Instead, the function can only be accessed via a specific virtual network. The function is private to the specified virtual network.
If the Azure Function needs to reach in to a virtual network to interact with resources either in the virtual network or connected via service endpoints, then virtual network integration is needed. This blog post focuses on the private site access. To view a tutorial on virtual network integration, please refer to https://docs.microsoft.com/azure/azure-functions/functions-create-vnet.
To learn more about Azure Functions networking options, please refer to https://docs.microsoft.com/azure/azure-functions/functions-networking-options.
Over the course of this blog post, the following steps will be demonstrated in order to configure private site access for an Azure Function:
- Create a virtual network
- Create a virtual machine
- Create an Azure Bastion service
- Create an Azure Function App plan
- Configure a virtual network service endpoint
- Create and deploy an Azure Function
- Invoke the function from outside and within the virtual network
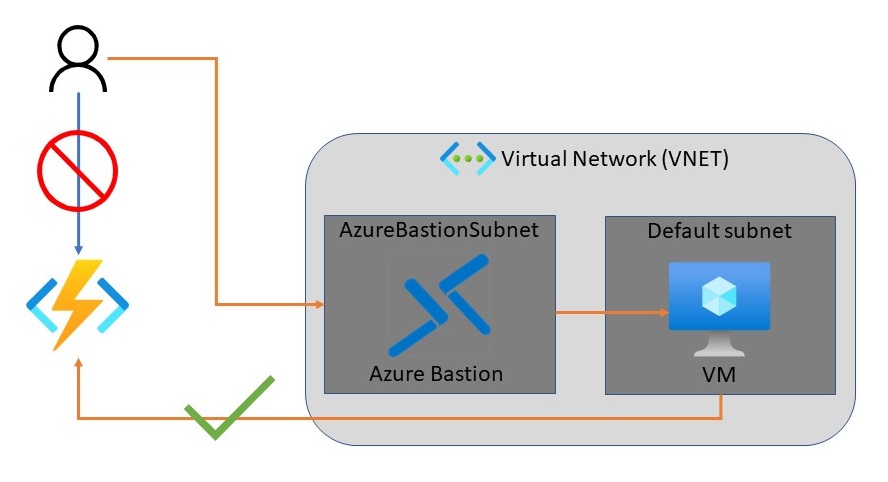
The following diagram shows the high-level architecture of the solution to be created:
Create a Virtual Network
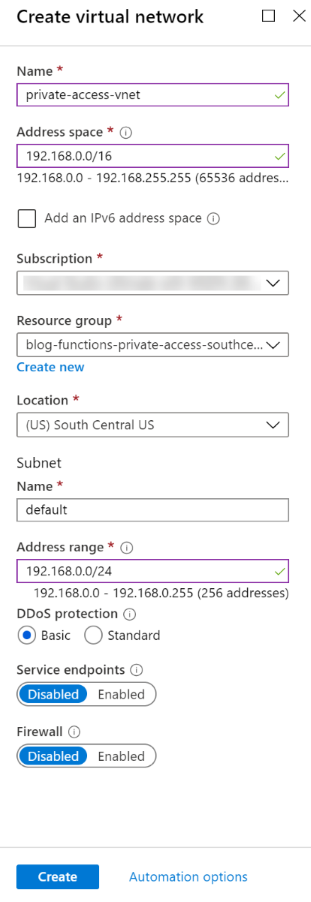
The first step is to create a new resource group, and then a new virtual network within the resource group. The virtual network will contain one subnet (with a name of “default”), and a new virtual machine within that subnet. The VM will be used to test invoking the function app. For the purposes of this blog post, the default virtual network settings will be sufficient.
With the virtual network, including a default subnet, in place, it is now time to put a resource in the virtual network. A new virtual machine will be created within the “default” subnet of the virtual network.
Create a Virtual Machine
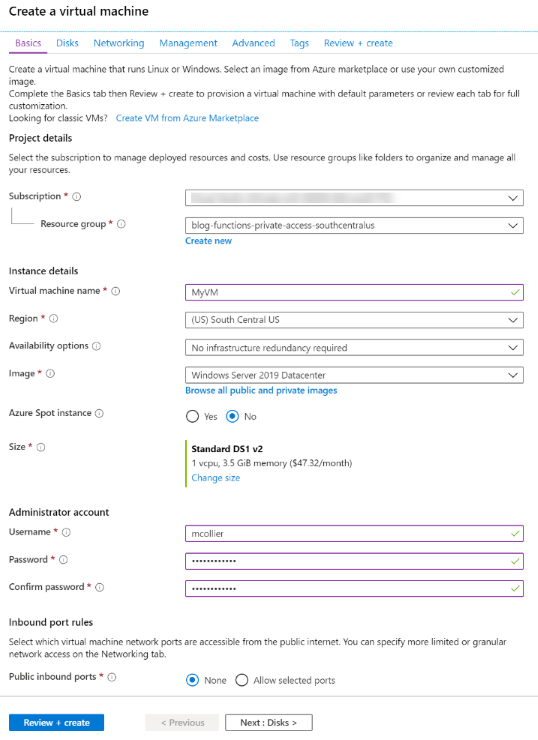
Next, create a new Windows Server 2019 Datacenter virtual machine via the Azure Portal. Microsoft provides a quickstart on creating a VM which outlines the basic steps for creating a VM. Below are a few additional details related to virtual network configuration, which isn't shown in the quickstart documentation.
Note – I’m using a Windows VM in this blog post, but a Linux VM could be used too. I’m just more familiar with Windows.
- In the Basics tab, keep the default settings to keep things simple for this blog post.
- Leave the defaults in the Disk tab.
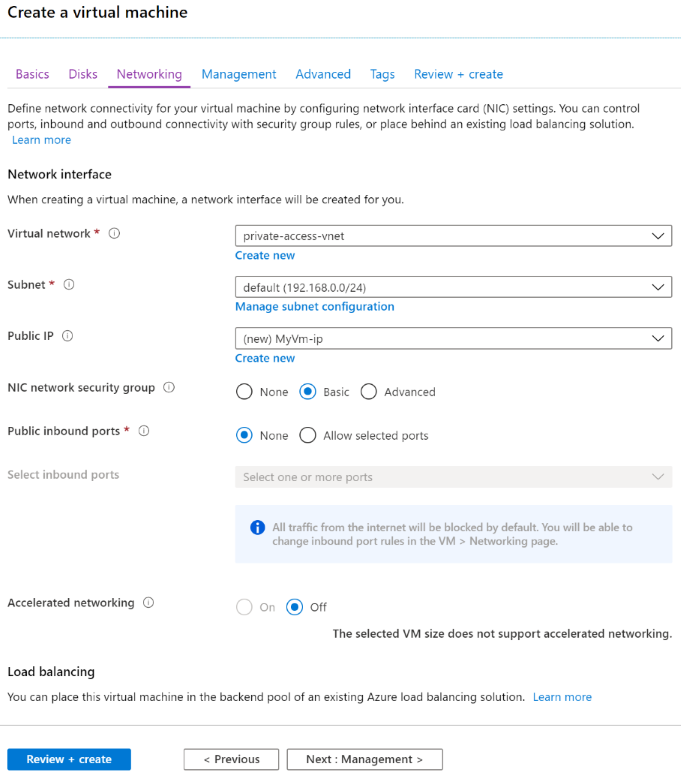
- In the Networking tab, select the previously created virtual network and subnet. For this blog post, one change to make from the defaults is to not have a public IP address. Remote access to the VM will be configured later via the Azure Bastion service. In many enterprises, this virtual network would often be connected to an on-premises network via Express Route or a site/point-to-site VPN connection.
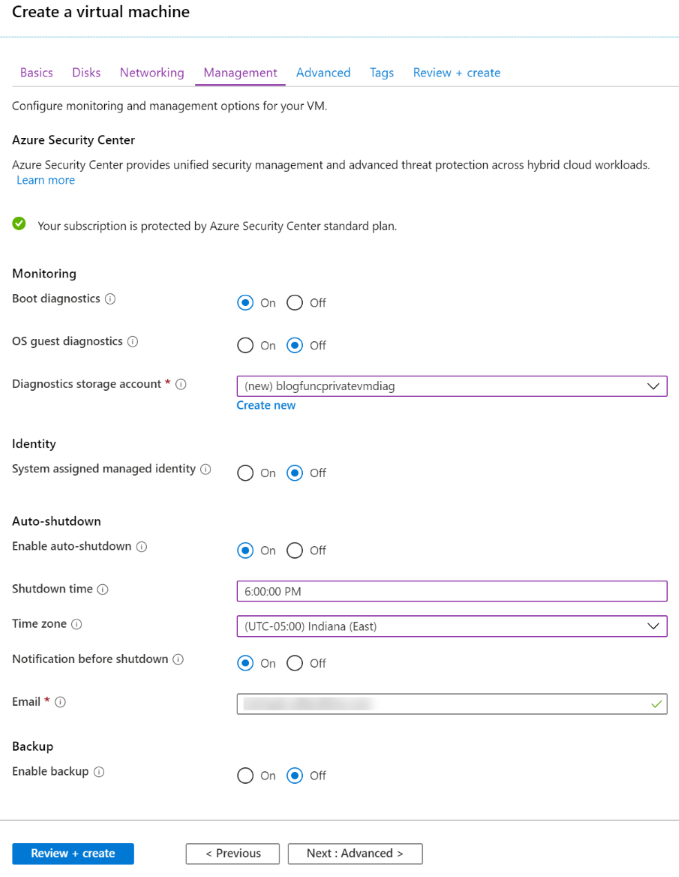
- In the Management tab, leave most of the defaults in place. For the purposes of this blog, I’ll change the auto-shutdown time to 6:00pm Eastern (as that is when I’m normally done with my day).
- Leave the defaults in place for the Advanced and Tags tabs.
- On the Review + create tab, the platform will perform some basic validation. Assuming the validation completes without error, it’s time to press the Create button. It’ll take a few minutes for the VM to be created.
Configure Azure Bastion
Azure Bastion is a fully-managed Azure service which provides secure RDP and SSH access to virtual machines directly from the Azure Portal. For the purposes of this blog post, using the Azure Bastion service removes the need to configure a VM, and related virtual network settings, for RDP access. It’s generally frowned upon to put a VM on the internet with a publicly discoverable RDP port. In fact, many organizations strictly prohibit doing so.
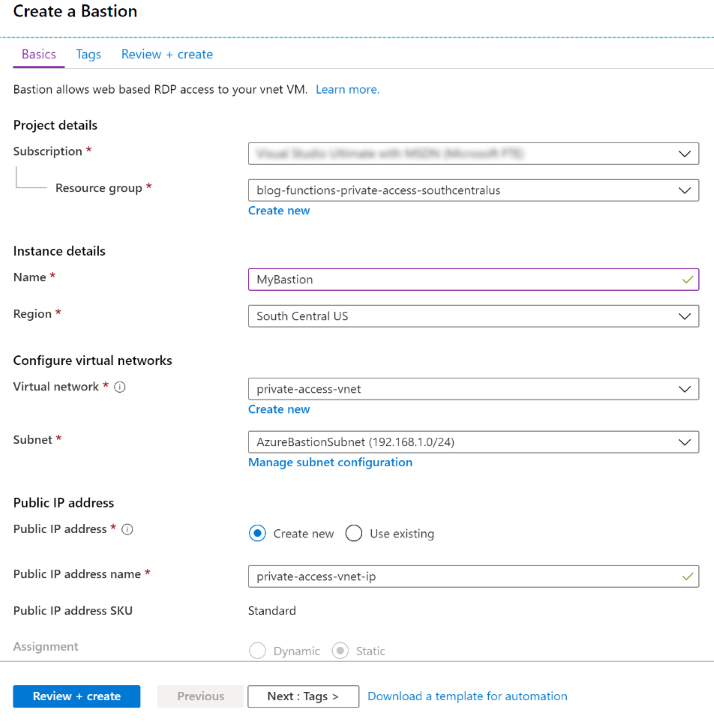
To configure the Azure Bastion service, follow the instructions at https://docs.microsoft.com/azure/bastion/bastion-create-host-portal. Creating an Azure Bastion service is relatively straight-forward, as can be seen in the screenshot below.
Create an Azure Function App
With the virtual network in place, the next step is to create an Azure Function App using a Consumption plan. The function code will be deployed to the Function App a bit later in this post.
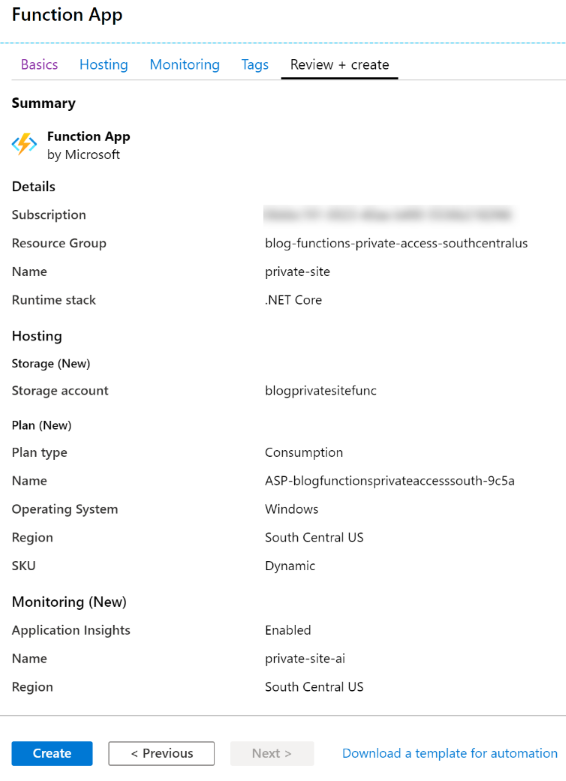
Step-by-step details for creating the function app is detailed in official Microsoft documentation, so I’ll not repeat it all here. To summarize, the following is being created:
- Plan: Azure Function Consumption plan
- OS: Windows
- Runtime: .NET Core
It is also beneficial to create an Application Insights resource to go along with the Function App. Why? Because Application Insights makes it easy to see what’s going on with the function. If something goes wrong, the logging via Application Insights is very helpful in diagnosing the problem.
Below is screenshot of the configuration settings used.
With the function app in place, the next step is to configure access restrictions to ensure only resources on the virtual network can invoke the function.
Configure Access Restrictions
Private site access is enable by creating an Azure virtual network service endpoint between the App Service plan (consumption) and the specified virtual network. Access restrictions are implemented via service endpoints. Service endpoints ensure that only traffic originating from within the specified virtual network can access the designated resource. In this case, the designed resource is the Azure Function.
Within the function app, proceed to the Platform features tab. Note that in the screenshot below, while there is a function app, there are no functions.
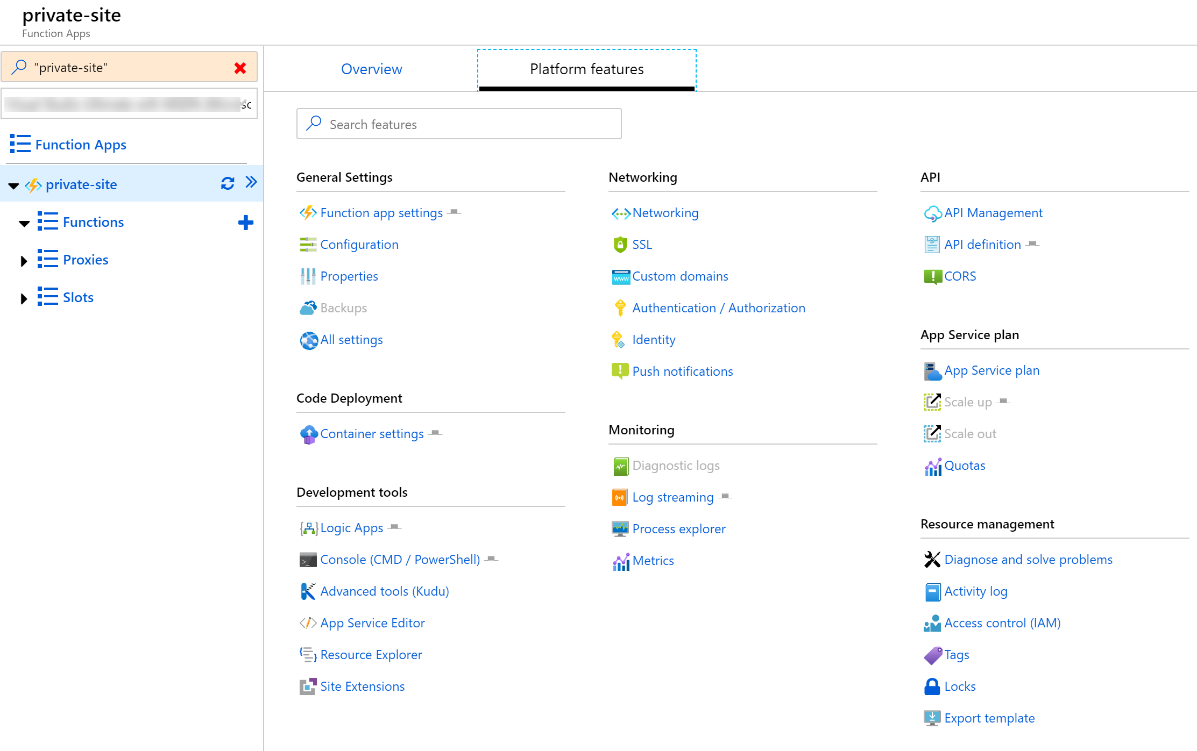
Click on Networking to open the Network Feature Status section. This page is the starting point to configure Azure Front Door, the Azure CDN, and also Access Restrictions. Private site access is configured via access restrictions. Click to Configure Access Restrictions.

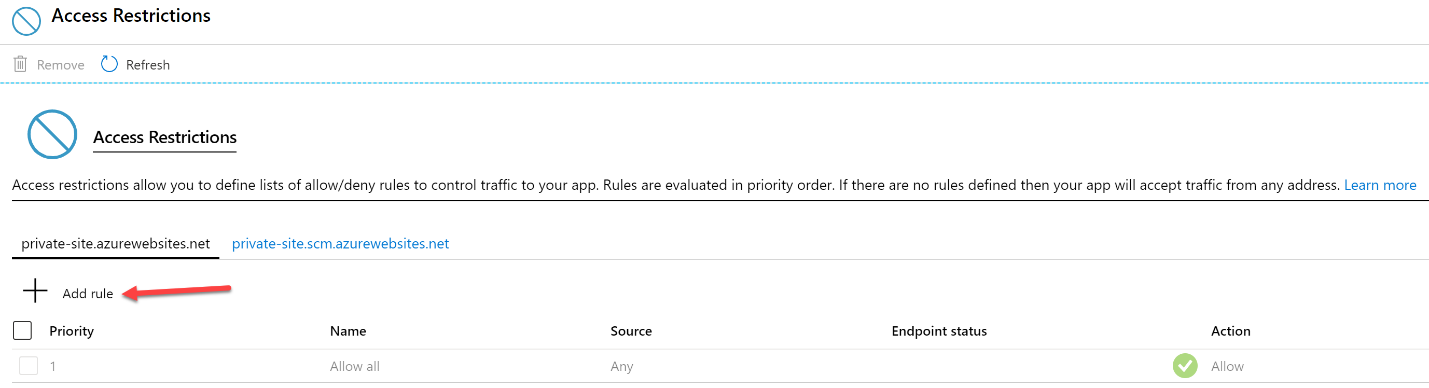
It can be seen on the Access Restrictions page that there are no restrictions in place. Well, there is a default which is to allow everything. For private site access, a new access restriction configuration needs to be created. Do so by first clicking on Add rule.
This will open new Add Access Restriction blade on the right side of the portal. The key configuration in this blade is to select Virtual Network from the Type drop-down selection box. Once Virtual Network is selected, select the desired virtual network and subnet.
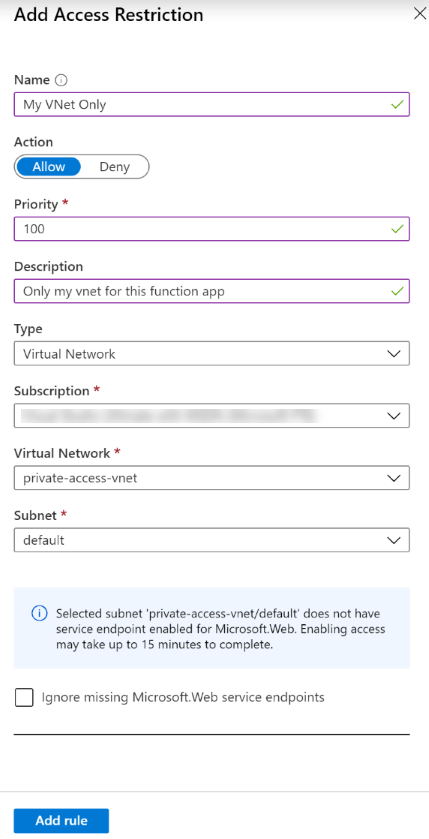
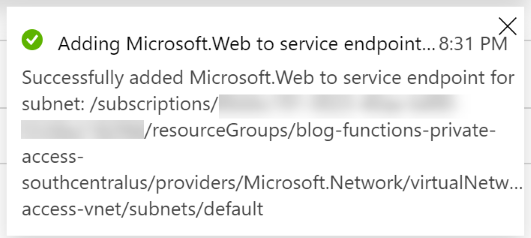
Notice in the above screenshot the information block indicating a service endpoint has not yet been enabled for Microsoft.Web. The service endpoint will automatically be created. In my experience, enabling the service endpoint normally takes a few seconds, not 15 minutes . . . but it is good to have that buffer.
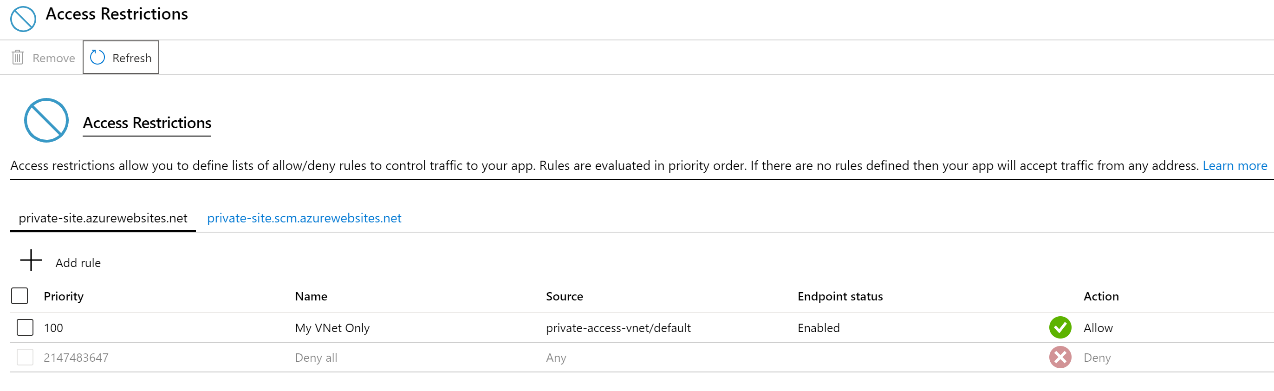
The Access Restrictions page now shows that there is a new restriction. It may take a few seconds for the Endpoint status to change from Provisioning to Enabled.
It is important to note that access restrictions have not been enabled on the SCM site, private-site.scm.azurewebsites.net. By not enabling access restrictions the SCM site, it will be possible to deploy the Azure Function code from a local developer workstation or another build service without needing to take extra steps to provision an agent within the virtual network.
Once the access restriction is in place, you will notice a warning at the top of the Azure Function app page - "Access restrictions have been added to your function app. This may affect your ability to manage it from the portal and make the runtime unreachable." At first this may be a little worrisome, but it makes sense. A rule has been created which indicates the function(s) should not be accessible from the public internet, but only the designated virtual network.

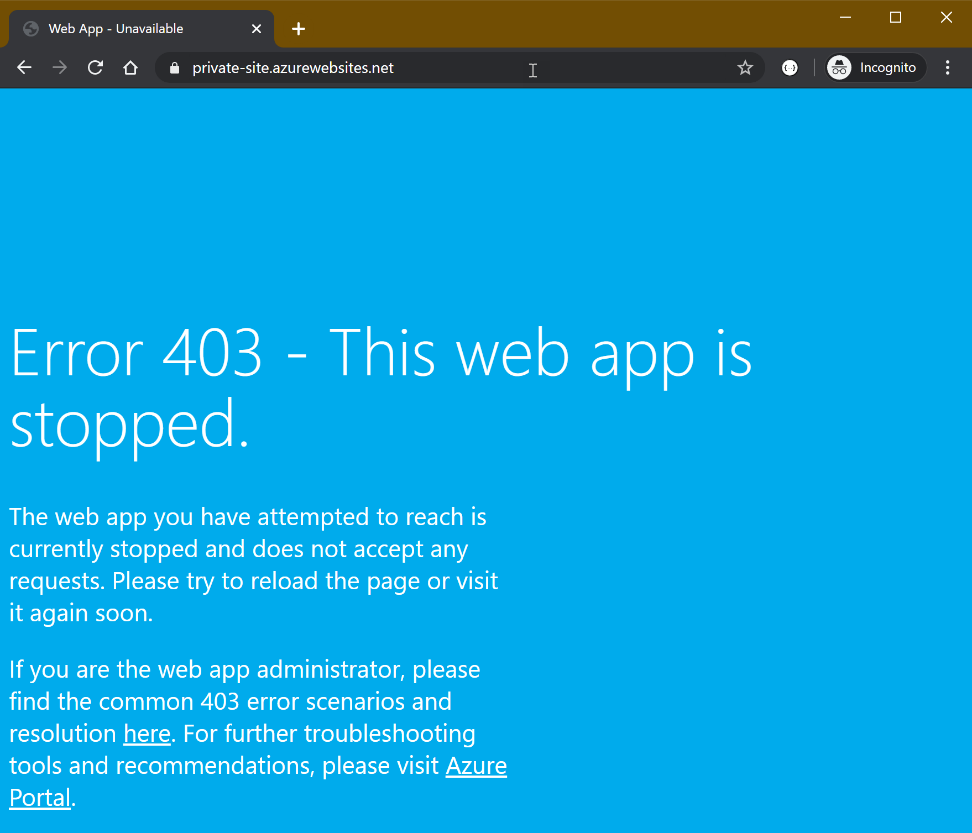
If you try to access the function app now, you should receive an HTTP 403 page indicating that the app is stopped. The app isn't really stopped. The response is actually a HTTP 403.6 - IP address rejected status. That makes sense, as the site is being accessed from outside the specified virtual network.
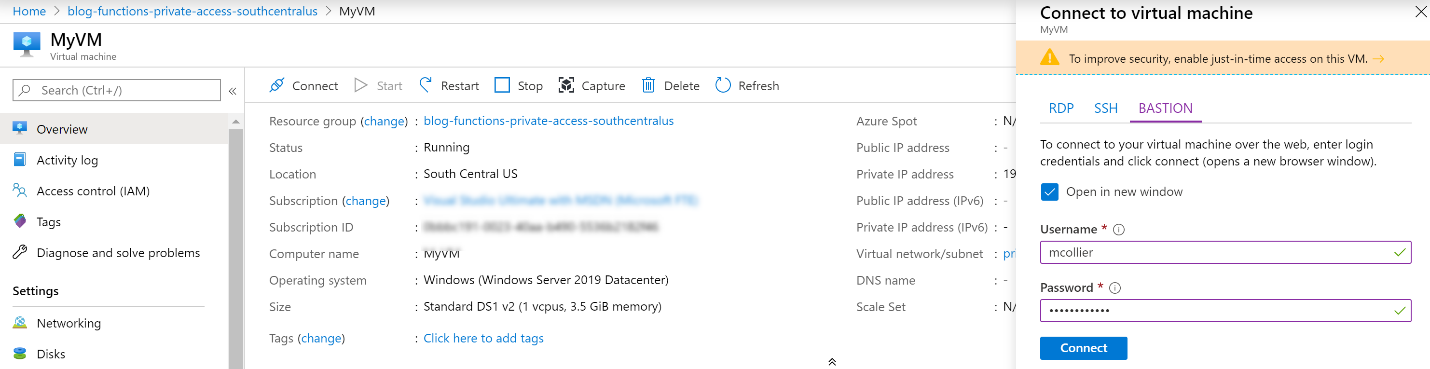
In order to access the site from the VM which was previously configured in the virtual network, connect to the VM via the Azure Bastion service.
From the web browser on the VM it is possible to access the site.
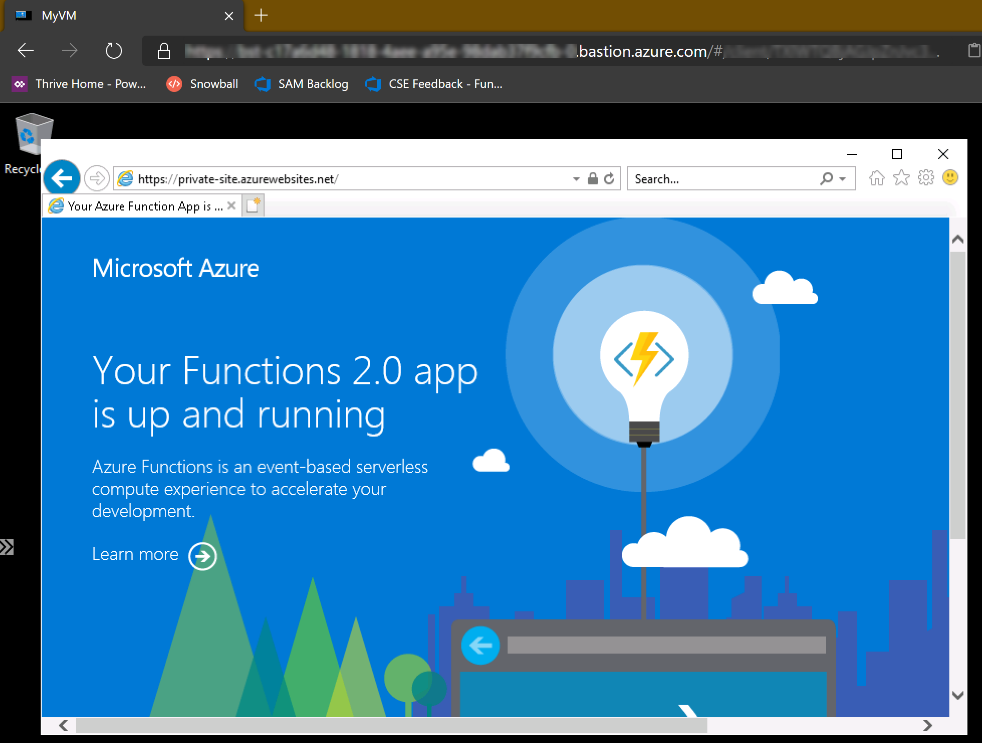
Fantastic! The function app isn’t really stopped.
From the VM on the virtual network it is possible to access the default Azure Function site. The next step is to create an Azure Function and deploy it.
It’s important to note that while the function app is only accessible from within the designated virtual network, a public DNS entry remains. As shown above, attempting to access the site will result in a HTTP 403 response.
Create an Azure Function
For the purposes of this blog post, a basic Azure Function is created by following the steps Microsoft provides for a quickstart to create a C# function. The quickstart tutorial creates a C# HTTP-triggered Azure Function. This results in an Azure Function that is accessed via a URL such as https://private-site.azurewebsites.net/api/Function1. Invoking the function via an HTTP GET or POST should result in a response of “Hello, {name}”.
There are four basic steps in the quickstart tutorial for creating an Azure Function:
- Create a function app project
- Run locally
- Publish to Azure
- Test it
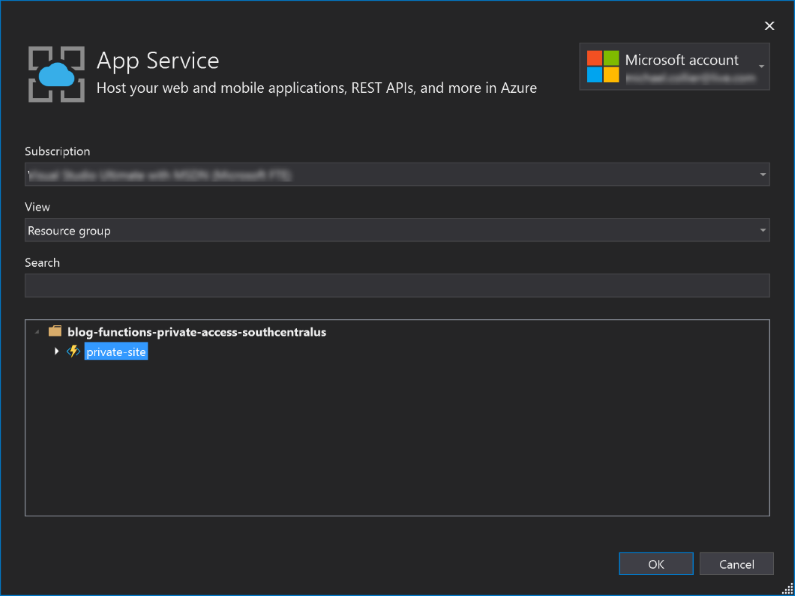
When publishing the function, select the Azure Function Consumption plan previously created. For this blog post, the Azure Function is deployed from my development laptop which is not connected to the virtual network used in this post. It is possible to do this because access restrictions where not configured for the SCM endpoint.
Invoke the Azure Function
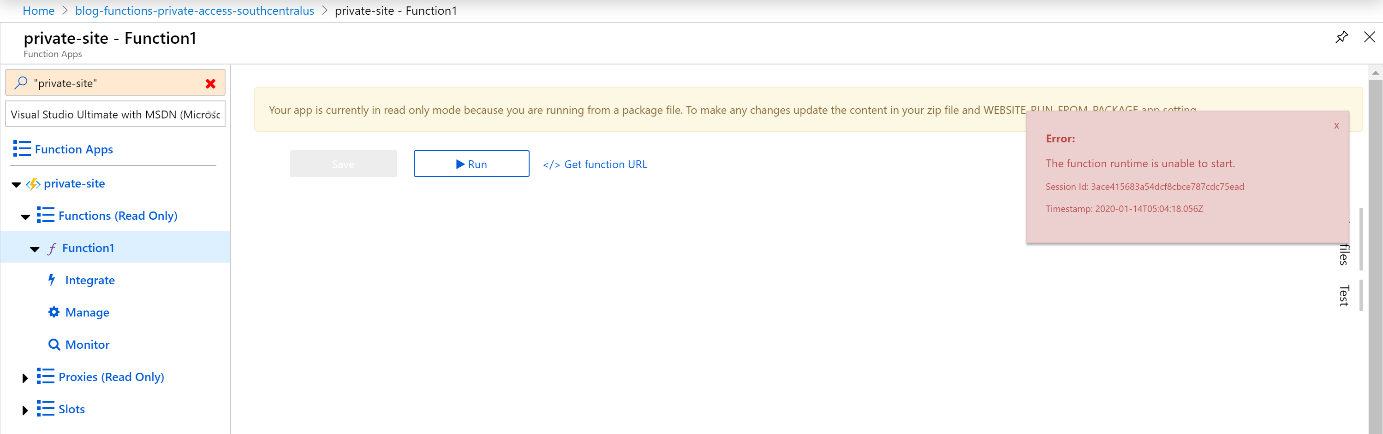
With the function deployed via Visual Studio, it’s time to go back to the Azure Portal. There should now be a function, Function1, in the list of functions. You may notice a somewhat concerning error message indicating that the function runtime is unable to start. This isn’t really true, as the function runtime is running, but the problem is that the Azure Portal, due to the access restrictions, isn’t able to make the query to check the runtime.
In order to test access to the function, copy the function URL and try to invoke it from a web browser. Doing so from a local machine will result in a 403 web app is stopped message.

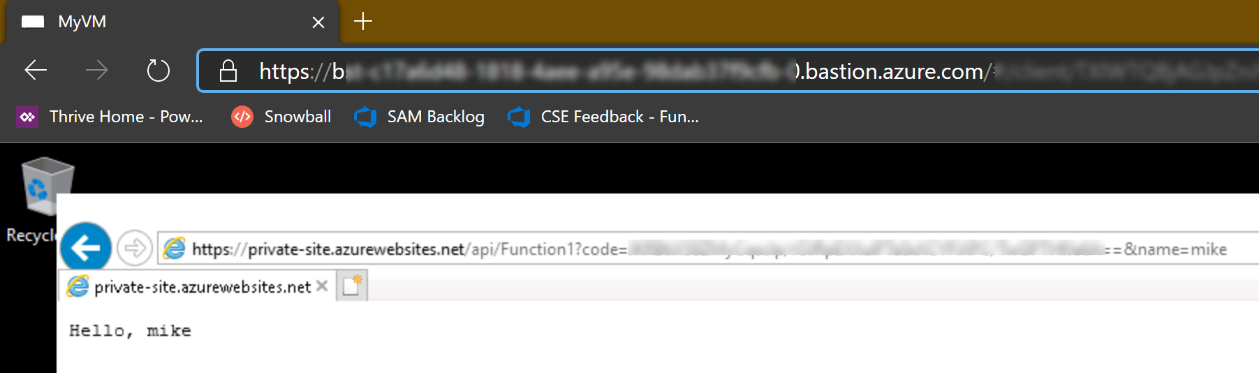
However, accessing the function via a web browser (by using the Azure Bastion service) on the configured VM on the virtual network results in success!!
Summary
In order to restrict access to an Azure Function to a specified virtual network, it is necessary to configure access restrictions via a virtual network service endpoint. Doing so will ensure that only resources from within the specified virtual network can trigger the Azure Function.
In this blog post, an Azure VM was used to demonstrate triggering the Azure Function. An alternative implementation could have easily been another Azure Function deployed to an Azure Function Premium plan with virtual network integration, or App Service Environment (ASE). The VM was used for simplicity in demonstrating the concept.
Thanks to Thiago Almeida and Alex Karcher for their assistance in reviewing this blog post.
Resources
- Azure App Service Access Restrictions
- Integrate Azure Functions with a Virtual Network
- Virtual Network Service Endpoints
- Azure Application Service Environment